Prepare Your Google Form
Before Smart Form Publisher can generate and send documents, it needs data collected through a Google Form. Designing your form properly ensures smooth placeholder mapping and accurate document generation.
Form Design Best Practices
Follow these recommendations when building your form:
- Use clear, descriptive question titles: These titles become merge tags (e.g.,
{{Full Name}}). Avoid overly long or unclear names. - Keep naming consistent: Use formats like Full Name,Email Address, Event Date. Avoid mixing styles such asfull_name and Full Name.
- Avoid duplicate question titles: Each merge field must be unique to prevent merge conflicts during document generation.
Supported Question Types
The following Google Form™ question types are supported for use as merge tags:
| Question Type | Merge Support | Notes |
|---|---|---|
| Short Answer | ✅ Yes | Ideal for Name, Email, ID, etc. |
| Multiple Choice | ✅ Yes | Captures selected option text |
| Checkboxes | ✅ Yes | Merges all selected options, comma-separated |
| Dropdown | ✅ Yes | Captures selected value |
| File Upload | ✅ Yes | Special handling required (see below) |
File Upload Questions
If you’d like to include uploaded files — such as photos, scanned IDs, or supporting documents — you can use File Upload questions in your Google Form.
Steps to Configure:
- Add a File Upload question to your form.
- Restrict file types to images or relevant formats (PDF, PNG, JPG).
- Inform respondents that uploaded files may be included in generated documents.
- Map the file upload field to a corresponding placeholder in your document or email template.
- Use clear placeholder names like:
{{Photo}}{{Resume}}{{Supporting Document}}
📝 Note: Uploaded files will be inserted or linked automatically in the published document if permissions allow access.
🔐 Important: Uploaded files must have “Anyone with the link can view”access, or Smart Form Publisher won’t be able to retrieve or display them.
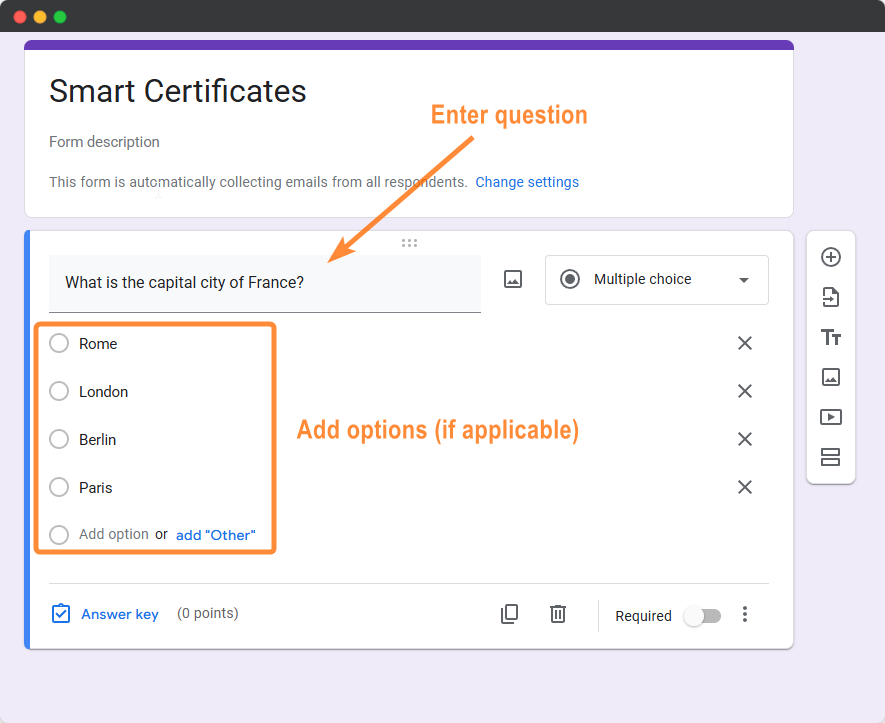
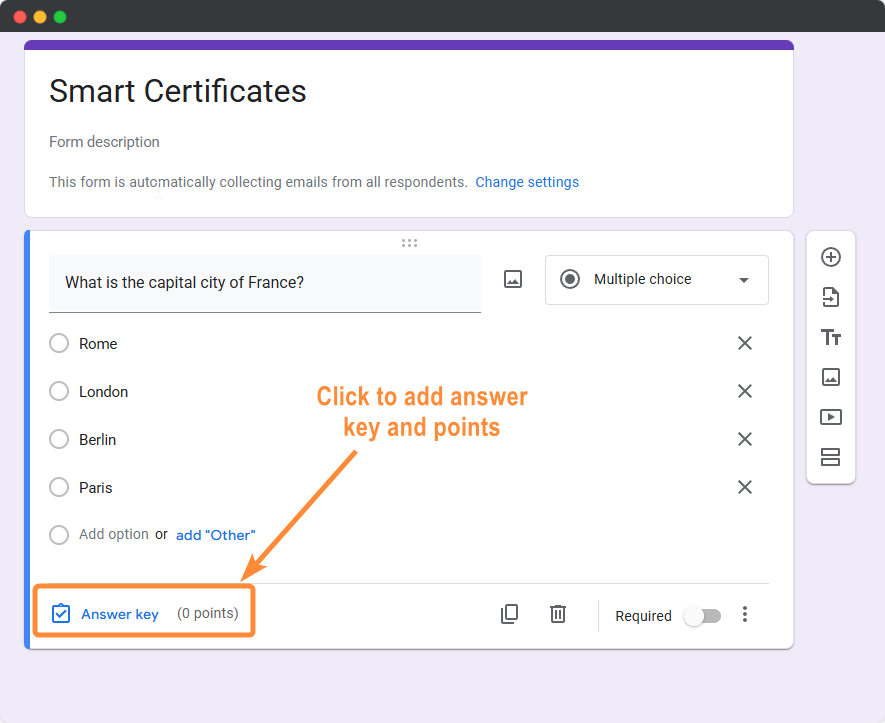
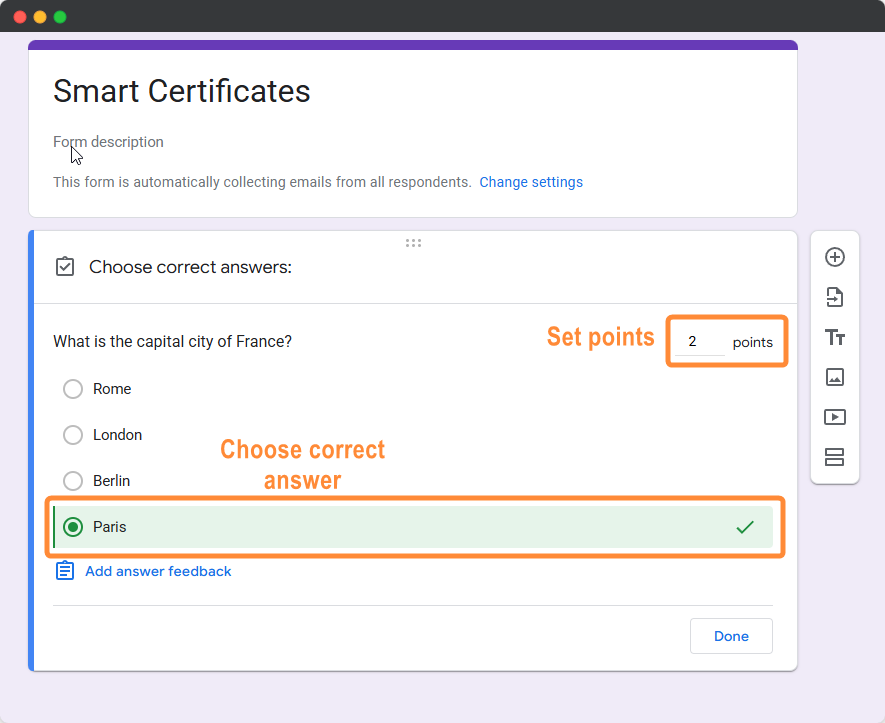
Enabling Quiz Mode for Certificates
If you plan to generate documents based on performance (such as certificates of completion 🎓), you must enable Quiz Mode in Google Forms™.
- Open the Settings tab in your Google Form™
- Enable “Make this a quiz”
- Assign points to each question
Why? This allows Smart Form Publisher to use system merge tags like {{Reached Points}} and {{Reached Percentage}}.
Configuring Email Collection
For Automated Email Delivery 📧 to work, Smart Form Publisher needs a valid email address for every respondent.
- Option A (Recommended) — Enable “Collect email addresses” in Form Settings.
- Option B — Add a Short Answer question titled “Email Address” and map it in the add-on sidebar.
Connecting to Google Sheets
While not strictly required, linking your Google Form™ to a Google Sheet™ is highly recommended before starting automation.
- Open the Responses tab
- Click Link to Sheets
📊 This sheet acts as your audit trail, storing direct links to every generated PDF automatically.
Using Section Headers for Logic
If you plan to use Conditional Logic (for example, sending different documents based on a Department selection 🧠), organize your form into sections. While section headers are not merged, they help structure data used to decide which template should be published.
Information Commonly Collected
Ensure your Google Form collects all essential information needed to personalize generated documents.
- ✅ Full Name – For document personalization
- ✅ Email Address – For automatic email delivery
- ✅ Project, Course, or Event Name – To include in the document or email
- ✅ Submission or Completion Date – For time-stamped records
- ✅ Additional Notes or Comments – For optional custom fields
- ✅ Uploaded File(s) – Optional; can be merged or attached
Example: Well-Structured Google Form

Once your form is complete and responses start coming in, you can connect it to a document template and automate publishing with Smart Form Publisher.